Garage Door Installation Services In The Woodlands, TX

Get Stress-Free Garage Door Service in The Woodlands, Texas

Make a call

(346) 574-0359

Email address

info@garagedoorswoodlandstx.com

June 19, 2026 admin No Comments

How to Get Your Garage Door Opener Force Adjustment Just Right for Smooth, Safe Operation

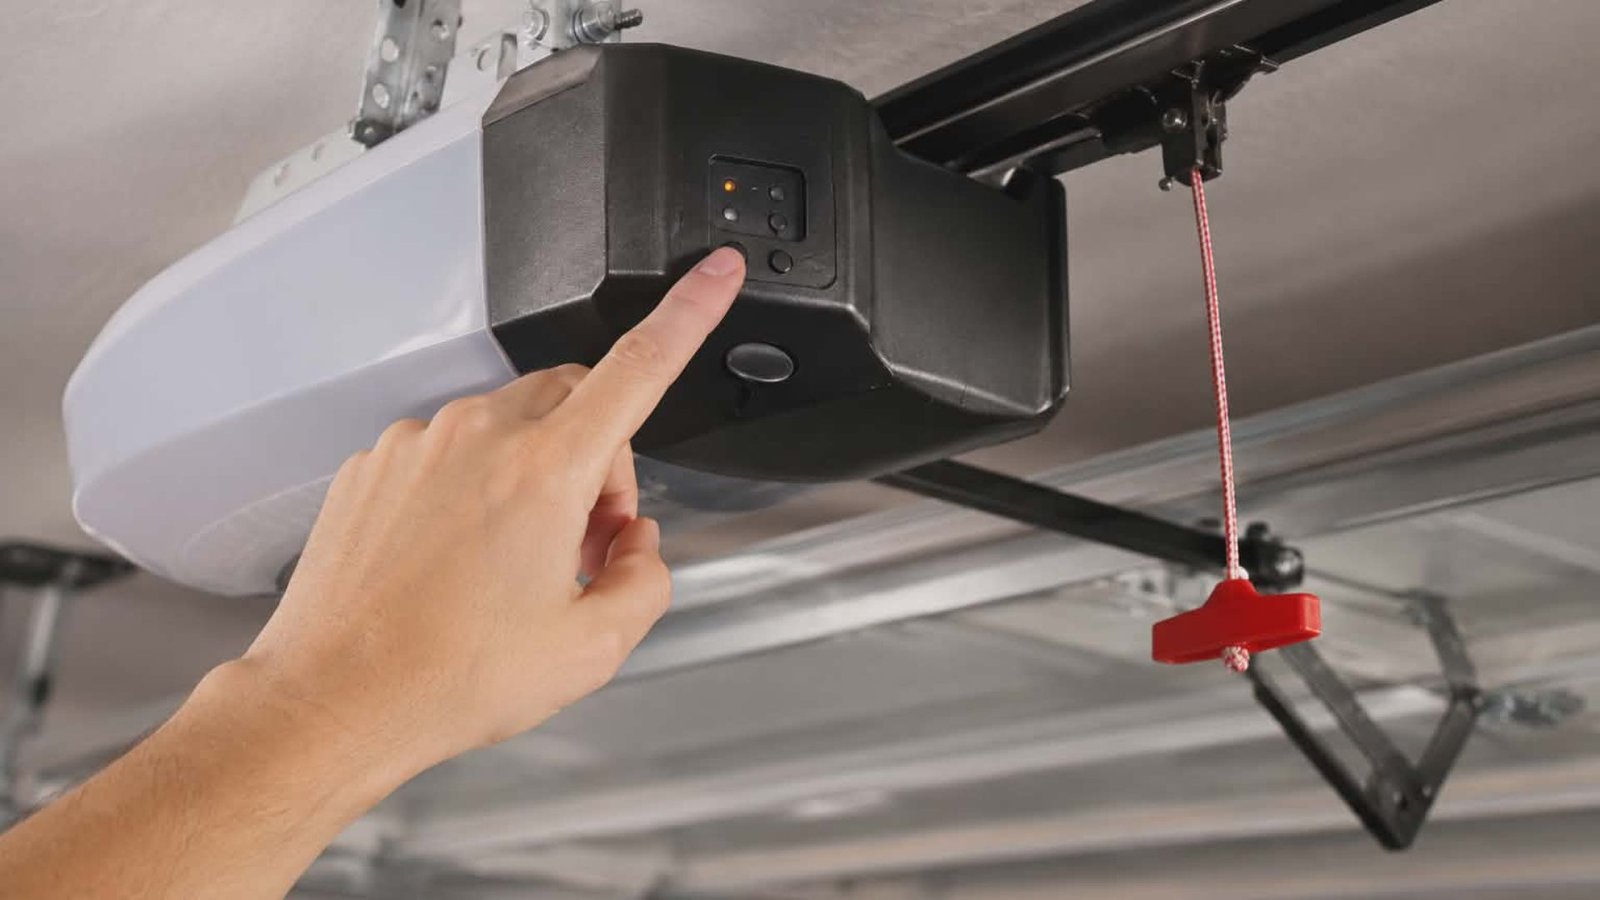
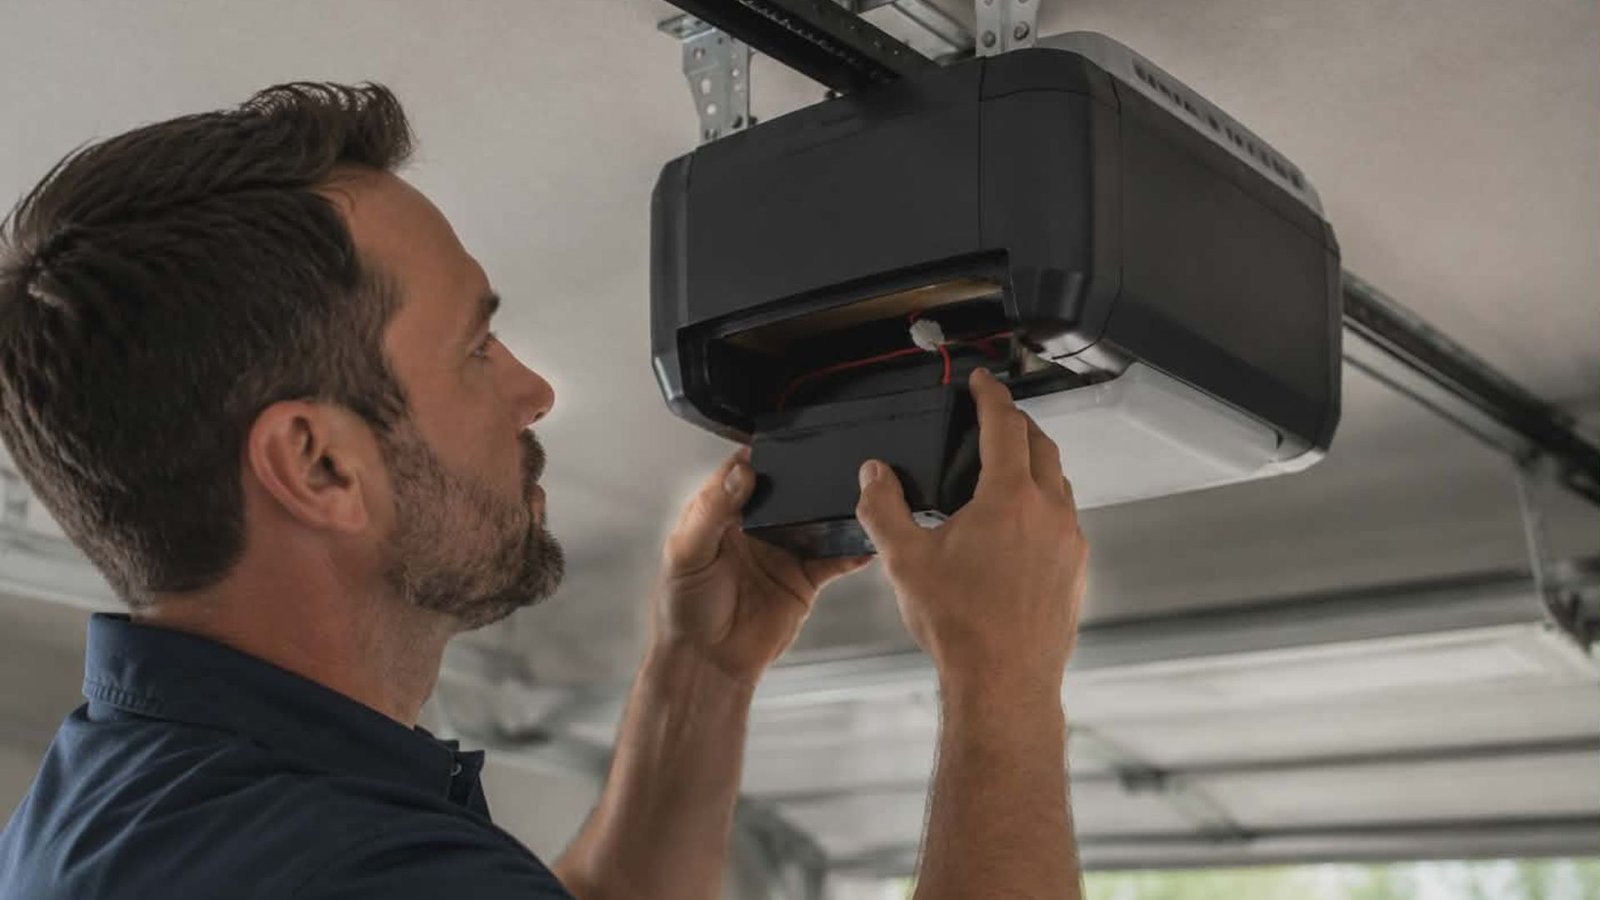
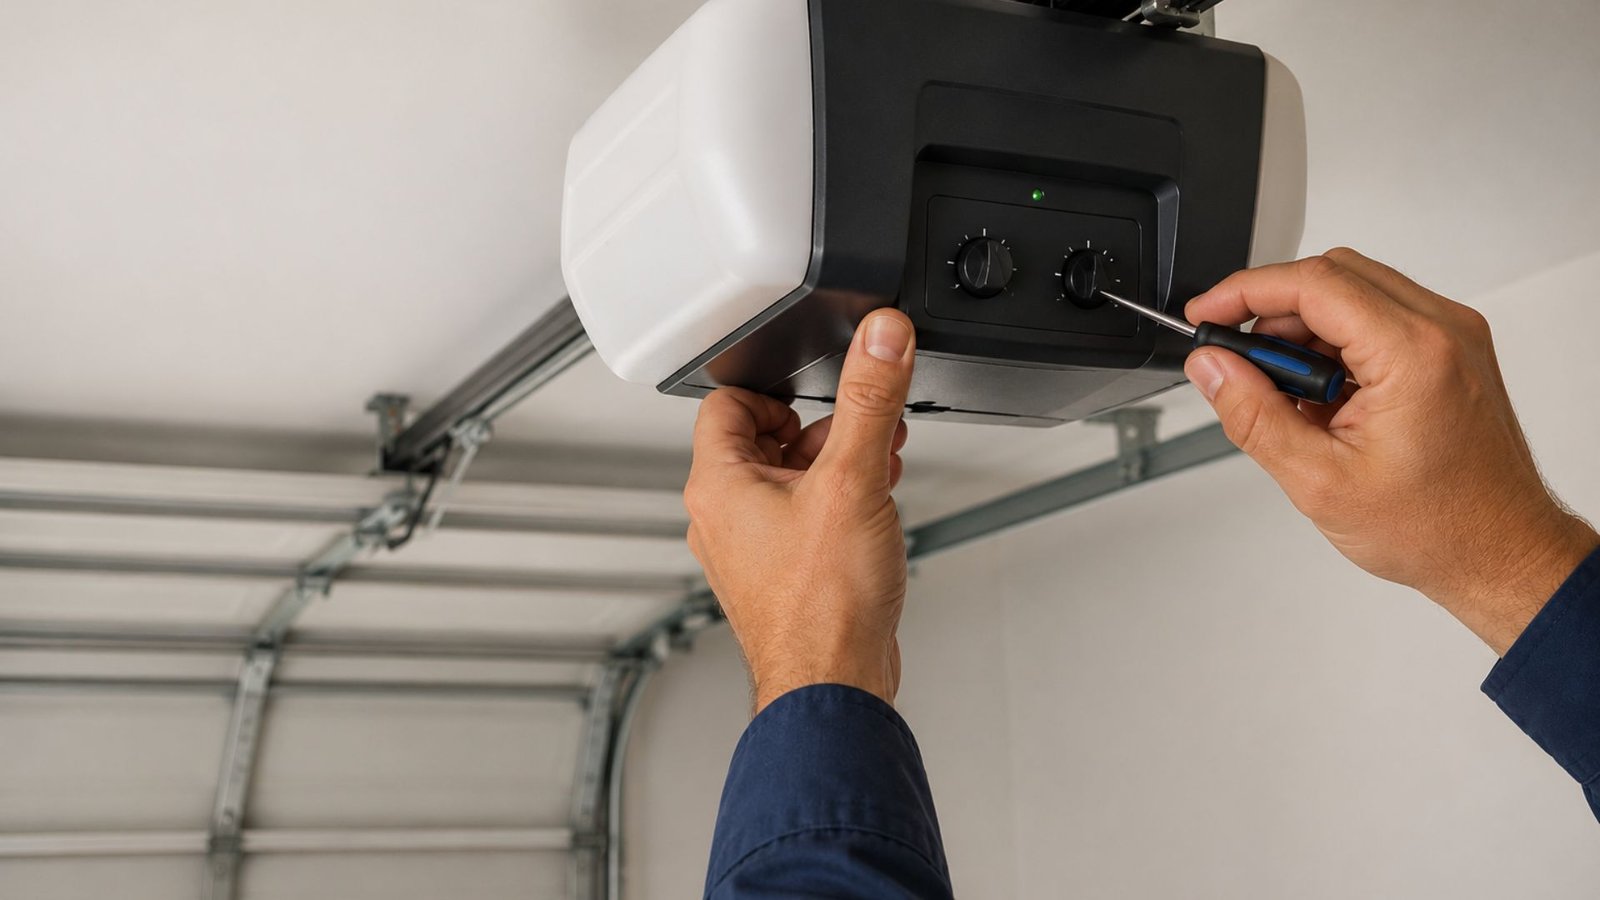
How to Get Your Garage Door Opener Force Adjustment Just Right for Smooth, Safe Operation If your garage door stops halfway, reverses unexpectedly, or struggles to open and close all the way, there is a good chance the force setting on your opener needs attention. Getting your garage door opener force adjustment dialed in correctly is one of the most overlooked parts of routine maintenance – and one of the most important. What Is a Force Adjustment and Why Does It Matter? The opener uses a set amount of force to push your door up and pull it down. If that force is set too high or too low, the door will behave unpredictably. Incorrect force settings can lead to property damage, increased wear on parts, or even injury if the door fails to reverse when it should. Most modern openers – including LiftMaster and Chamberlain models – come with built-in adjustment controls that let you fine-tune how much power is applied during operation. How to Locate the Adjustment Controls on Your Opener Before you adjust force settings, check your owner’s manual. Most garage door openers with manual adjustment controls will have labeled dials or adjustment screws on the back or side of the motor unit. For a LiftMaster garage door opener, you will typically find separate dials for up force and down force. The labels are usually marked with a plus and minus symbol, making it easy to adjust the travel and force settings without guessing. How to Adjust Force Settings Step by Step Check Trolley Travel on Rails First Before touching anything, check the trolley’s travel on the rails to rule out a mechanical issue. If the trolley is binding or misaligned, no amount of force adjustment will fix the problem cleanly. Also, take a moment to rule out a safety sensor problem. If the opener’s lights are blinking, you may have issues with the sensors that need to be resolved before adjusting anything else. Adjust the Up Force Setting To test the up force setting, press the button to open the door. If the door stops without opening completely, you may need to increase the upward force. Try turning the adjustment screw clockwise in quarter-turn increments, then retest after each adjustment. Inadequate up force can cause the door to stop on its way up, which is frustrating and potentially a safety issue. Adjust the Down Force Setting Make sure that the downforce is not set too high. To test this, try to stop the door using your hand while the door is closing. The door should still stop if you catch it with moderate resistance – if it does not reverse and open back up, reduce the down force immediately. Making small adjustments here matters. Turn the screw a quarter-turn at a time and test the new settings to make sure the force isn’t excessive. Testing After Every Adjustment Once you adjust force settings and test the new results, check the door for smooth operation throughout the full cycle. Make sure the door closes and opens completely without hesitation. If the door freezes on the way up or the garage door freezes mid-cycle, fix any problems you find before using the door again. Also, check for anything caught in the path of the door that could interfere with travel limits. Retest after each adjustment until the door opens and closes easily and the door stops and reverses at the right moments. When to Call a Professional If you have gone through all the steps to adjust the garage door opener force and the issue persists, it may be time to bring in a technician. There are situations – like limit and force conflicts or worn hardware – where a DIY approach will not get you there. You can also find helpful visual walkthroughs on YouTube if you want to see the process before attempting it yourself. Conclusion Getting your garage door opener force adjustment right keeps your door operating safely and extends the life of your equipment. If you have worked through the steps above and still cannot get consistent results, the team at 2Quick Garage Doors Woodlands is ready to help. From opener repair to full maintenance visits, they bring the expertise to get things working correctly the first time. Call (346) 574-0359 to schedule service today.

Read More
June 17, 2026 admin No Comments

Nylon Vs Steel Garage Door Rollers: Which Is Quieter, Stronger, And Worth The Money?

Nylon Vs Steel Garage Door Rollers: Which Is Quieter, Stronger, And Worth The Money? If your garage door sounds like a freight train every time it opens, the roller is probably the culprit. If you’re shopping for replacements, you’ve likely faced the same question: nylon or steel. It’s a simple question with a surprisingly layered answer. Both materials work. Both have real advantages. But the right choice depends on how you use your garage, what you value most, and how much maintenance you’re willing to do. Let’s break it all down so you can make a confident call. What Does a Garage Door Roller Actually Do? A garage door roller is a small wheel that fits into the garage door tracks and allows the door to slide up and down smoothly. Each roller sits on a stem attached to a hinge, and together they guide the entire door system along its path. Without good rollers, even the best garage door opener in the world will struggle. The roller takes on constant friction, weight, and mechanical stress every single time the door operates. That’s why choosing the right rollers matters more than most homeowners realize. Steel Vs Nylon Garage Door Rollers: The Core Differences When comparing steel vs nylon garage door rollers, you’re really comparing two different philosophies. Steel prioritizes raw strength. Nylon prioritizes smooth, quiet operation. Here’s a closer look at how nylon and steel stack up across the factors that matter most. Noise: Rollers Are Quieter When They’re Made of Nylon This is the big one for most homeowners. Nylon rollers are much quieter than steel rollers, and the difference is noticeable from the first use. Steel rollers are known for a distinct rumbling or grinding noise as metal contacts metal inside the garage door tracks. Nylon, being a plastic-based material, naturally absorbs vibration and reduces friction during operation. If your garage is attached to your living space or a bedroom sits near the door, nylon rollers for quieter operation are a real quality-of-life upgrade. Strength and Durability: Advantages of Steel Rollers Steel rollers are better suited for heavier doors. If you have a large residential garage door or a commercial application, steel handles the pound-for-pound demands better than most nylon alternatives. Steel rollers are usually built with a ball bearing assembly, which helps distribute the load evenly across the wheel. High-quality bearing rollers with sealed bearings can last through thousands of cycles without significant wear. That said, the advantages of nylon rollers in terms of durability have improved significantly with modern technology. Nylon rollers with sealed bearings now rival steel in lifespan for most residential garage door setups. Maintenance: Rollers Require Different Care Steel rollers require regular lubrication to prevent corrosion and metal-on-metal friction. Without grease applied consistently, steel rollers can wear down the garage door tracks and create problems throughout the entire door system. Nylon rollers require less upkeep by comparison. Garage door maintenance requires less frequent lubrication because the material itself reduces friction naturally. For homeowners who don’t want to think much about maintenance, that’s a meaningful advantage. Rollers without bearings – whether nylon or steel – will always need more attention and wear out faster. When possible, choose rollers with sealed ball bearing assemblies. Cost: What Rollers Cost Upfront and Long-Term Steel and nylon options differ in price, though not dramatically. Steel rollers are generally the more affordable upfront option. You can find basic steel rollers for a few dollars each, though heavy-duty bearing rollers cost more. Nylon roller prices have come down as the material has become more mainstream. When you factor in the reduced maintenance, longer useful life in residential applications, and the reduced wear on garage door components, nylon ones often provide better long-term value. Rollers typically fall into a price range where the difference per unit is small. The real cost difference shows up over years of use. Choosing the Right Rollers for Your Garage Door So how do you decide? Here’s a practical way to think about it. Choose nylon if: Steel rollers might be the better call if: For most homeowners in The Woodlands, standard residential garage doors are well within the weight range that nylon rollers can handle comfortably, making them a great fit. Nylon rollers are durable and, compared with steel rollers in the same bearing class, provide smoother, quieter operation day after day. When to Replace Your Garage Door Rollers Worn-out rollers or upgrading from plastic rollers to a higher-quality option can dramatically improve how your garage door performs. If you notice shaking, grinding, or uneven movement, new rollers can make an immediate difference. Rollers can last anywhere from five to fifteen years, depending on the material, bearing quality, and how often the door goes up and down. Rollers may fail sooner in high-use homes, especially if lubrication and inspection are skipped. A professional garage door technician can inspect your current setup and recommend the right garage door rollers for your specific door system. A garage door professional will also identify whether the issue is the roller itself or something else affecting the garage door’s performance. Get the Right Help From a Trusted Local Team Whether you’re replacing worn-out rollers or planning a full garage door upgrade, getting professional garage door services makes the job faster and safer. Rollers need to be properly seated in the tracks, and the wrong installation can put stress on the hinge and the entire garage door system.For professional garage door repair and roller replacement in The Woodlands, the team at 2Quick Garage Doors Woodlands is ready to help. Call (346) 574-0359 to schedule door services today.

Read More
June 1, 2026 admin No Comments

Easy Guide on How to Change Garage Door Opener Code

Easy Guide on How to Change Garage Door Opener Code If you’ve just moved into a new home or suspect someone has your old access code, knowing how to change your garage door opener code is one of the smartest things you can do as a homeowner. The good news? You don’t need to hire anyone to get it done. This is a straightforward home repair task that most people can handle in under ten minutes. This guide to changing your garage door opener code walks you through everything clearly, from understanding your opener to programming a brand new code with confidence. Why You Might Need to Change Your Garage Code There are a few common reasons you might need to reset or update your code. Maybe you’re moving into a new home and want to clear out whoever had access before. Maybe a garage door remote went missing, or you simply want to update your code as a routine security habit. Changing a garage door code is one of the easiest ways to protect access to your home without spending a dime on a technician. It’s something every homeowner should know how to do. What You’ll Need Before You Start Before you change a garage door keypad code, gather a couple of things: If you can’t find the manual, most brands like LiftMaster, Chamberlain, and Genie have their documentation available online. Knowing your opener’s brand makes it much easier to find the right steps. Step-by-Step Guide to Changing Your Garage Door Opener Code Step 1 – Clear the Old Code The first thing you’ll want to do is erase the old code stored in the opener. This is done directly on the garage door motor unit, not through the keypad. Locate the “LEARN” button – usually a small colored button on the back or side of the motor unit. Press and hold the learn button until the indicator light next to it turns off. This usually takes about six seconds and confirms the memory has been cleared. All previously programmed remotes and codes will be erased at this point. Step 2 – Program a New Keypad Code Now it’s time to set a garage door keypad code. Walk over to your wireless keypad, which is typically mounted outside your garage on the door frame. Enter your desired 4-digit code on the garage door opener keypad, then press the “LEARN” button on the opener unit once and release it. The LED will light up briefly. Within 30 seconds, go back to the keypad and enter your new code again, then press the enter or send button. If done correctly, the opener light will flash, or you’ll hear two clicks, confirming the new code is active. Step 3 – Test the Keypad Code Enter your new code on the keypad to open the garage door. If the door moves, you’re all set. If nothing happens, repeat the process – timing matters here, since you need to sync the keypad within 30 seconds of pressing the learn button. Don’t get discouraged if it takes a second attempt. This is normal, especially if you’re working with an older model. How to Reprogram Your Remotes After Resetting When you reset the code and clear the opener’s memory, you’ll also need to sync any garage door remotes you use. This step is easy to overlook but important. To reprogram remotes, press the learn button on the opener once. Then, within 30 seconds, press and hold the button on the remote you want to sync. When the opener light blinks or you hear a click, the remote is paired. Repeat this process for each remote you want to work with the system. If you use a smart garage door app or have a smart opener connected to your home’s Wi-Fi, you’ll need to reset the code through the app as well. Check your unit’s settings menu or consult the app for guidance. Tips for a Craftsman Garage Door Keypad Code Reset If you have a Craftsman model, the process is very similar, but the learn button is typically located on the back of the opener near the antenna wire. To reset a Craftsman garage door keypad, press the button until the indicator light blinks twice, then program the keypad within 30 seconds. Always refer to the manual for instructions if the light sequence looks different. Keeping Your Garage Door Code Secure Once you’ve completed changing your garage door code, there are a few habits worth building. Change your code periodically – every six to twelve months is a good rule of thumb. Avoid using obvious combinations like birth years or repeating digits. If you have a smart garage door opener with remote access and remote control features, make sure your app account is also secured with a strong password. A smart opener is only as secure as the account protecting it. Also, if you’re moving into a home for the first time, treat it the same as you would the locks on your front door. Reset the code before anything else. It’s a simple step that delivers real peace of mind. When to Call a Professional Instead Sometimes, the need to reset your garage door opener code reveals a deeper issue. If the learn button isn’t responding, the opener keeps losing its programming, or the door won’t open and close properly after reprogramming, there may be a hardware or wiring problem behind the scenes. In that case, calling a trusted opener repair service is the right move. Conclusion Learning how to change a garage code is one of those small tasks that makes a big difference for your home’s security. With this step-by-step guide, most homeowners can handle it without any professional help. But if something isn’t working as it should, 2Quick Garage Doors Woodlands is ready to help. From opener repair to full installations, their team keeps your garage running safely. Call (346) 574-0359 to get started.

Read More
May 20, 2026 admin No Comments

How to Replace Garage Door Seal: A Step-By-Step DIY Guide

How to Replace Garage Door Seal: A Step-By-Step DIY Guide If you’ve noticed drafts, water, or pests sneaking under your garage door, a worn-out seal is likely the culprit. The good news? This is one of the more beginner-friendly home repairs you can tackle on a weekend. This guide walks you through everything you need to know. Why the Bottom Seal Matters The garage door bottom seal is your first line of defense against the elements. Over time, rubber degrades, cracks, and loses its flexibility – especially in climates with fluctuating temperatures. Replacing it promptly protects your floor, your belongings, and your energy bill. Tools You Will Need Before you start, gather the right tools for each step: You can find replacement seals at most hardware stores. If you want to learn more about compatible seal types, YouTube has some useful visual references worth checking out. Step-By-Step Guide to Replacing Your Garage Door Seal Step 1 – Remove the Old Seal Use a utility knife or flathead screwdriver to carefully remove the old seal from the track at the bottom of the door. Take your time here – rushing can damage the track. Step 2 – Measure the Door Width Measure the full width of your garage door before purchasing a replacement. It is better to buy slightly more than you need and trim the excess later. Step 3 – Slide in the New Seal Most rubber seals fit into a retainer track. Slide or fold the new seal into place along the track, working from one end to the other. Step 4 – Secure the Seal in Place Use screws or the existing retainer to lock the seal in place. Double-check that the seal sits flush against the ground when the door is closed to ensure a proper fit. Step 5 – Trim Any Excess Use your utility knife to cut any excess material cleanly. A neat finish helps the seal perform better and last longer. When to Call a Professional If you notice damage beyond the seal – like misaligned tracks, broken springs, or a door that won’t close properly – it’s time to reach out for professional garage door repair services. You should also consider scheduling routine garage door maintenance to catch issues before they become costly repairs. For newer installs or full door replacements, learn more about expert garage door installation. And if your springs are showing wear, look into garage door spring repair and replacement. This type of seal replacement project is straightforward, but your garage door system as a whole deserves regular attention. Conclusion Replacing a garage door seal is a simple project that pays off in comfort, energy savings, and protection. With the right tools and this step-by-step guide, most homeowners can handle it in under an hour. That said, if you run into bigger issues along the way, the team at 2Quick Garage Doors Woodlands is ready to help. Call us at (346) 574-0359 to learn more about our services.

Read More
May 18, 2026 admin No Comments

How To Change Battery In Garage Door Opener (Quick And Easy Guide)

How To Change Battery In Garage Door Opener (Quick And Easy Guide) Your garage door opener stops responding, and you immediately wonder if something is seriously wrong. Before you call for repairs or spend money on a new unit, check the battery first. A low or dead battery is one of the most common reasons an opener acts up, and replacing it is easier than most people think. What You Need Before You Start Gather a few simple items before you begin. You will need a screwdriver, a replacement battery that matches your opener model, and your owner’s manual for reference. If you have a LiftMaster garage door opener, the battery type is usually printed inside the remote or on the back panel of the unit. Not sure which battery to buy? Check YouTube for a quick video walkthrough specific to your model. Many manufacturers, including those under the Chamberlain Group, publish step-by-step instruction videos to guide homeowners through the process. How To Replace a Garage Door Opener Battery Step by Step Follow these simple steps to replace the battery in your overhead opener: Some units use button cells, while others use 9-volt or AA batteries. Always follow the instructions in your manual to avoid using the wrong type. When a Battery Swap Is Not Enough If you replace the battery and the opener still does not work, the issue may go deeper. Safety sensor misalignment, worn motor components, or wiring faults can all affect performance. In those cases, it helps to reach out to professionals who perform reliable garage door repair services rather than guessing at a fix. For homeowners in The Woodlands who need expert help, 2Quick Garage Doors Woodlands offers professional garage door opener repair and installation, comprehensive garage door maintenance, and expert garage door installation services. Whether your replacement needs are simple or complex, their team is ready to assist. Conclusion Changing a garage door opener battery is a simple task that can save you time and money. Following the right steps and using the correct battery will get your opener back to full power quickly. However, if the problem persists after the swap, do not ignore it. Schedule a service call with a trusted local expert to keep your garage door running safely and smoothly. Contact 2Quick Garage Doors Woodlands at (346) 574-0359 to learn how they can help.

Read More
May 13, 2026 admin No Comments

How to Lubricate a Garage Door the Right Way (and What to Avoid)

How to Lubricate a Garage Door the Right Way (and What to Avoid) Your garage door works hard every single day. It opens, closes, and takes the full brunt of weather, humidity, and constant mechanical stress. Over time, that wear and tear adds up, and one of the simplest ways to keep things running well is proper lubrication. However, most homeowners either skip this step entirely or do it incorrectly. Using the wrong lubricant for your garage door can actually attract dirt and debris, cause buildup, and lead to costly repairs down the road. This guide walks you through exactly what to do, what to avoid, and how to extend the life of your garage door with minimal effort. Why Lubrication Matters More Than You Think A well-lubricated garage door does more than just operate smoothly and quietly. It reduces friction between metal-to-metal contact points, prevents rust from forming on key components, and lowers the risk of premature failure on springs, rollers, and hinges. In a climate like The Woodlands, Texas, where humidity can swing dramatically between seasons, moisture is a real threat. Without proper lubrication, grime and grit work their way into the moving parts and grind them down faster than you would expect. Noise reduction, smooth operation, and a longer lifespan all start with a consistent lubrication routine. What You Will Need Before You Start Before you lubricate your garage door, gather the right supplies. Choosing the right lubricant makes all the difference. Recommended products: What to avoid using: Step-by-Step Guide to Lubricating Your Garage Door Step 1: Inspect and Clean First Start by disconnecting the door opener and manually operating the door to check for loose hardware, damaged rollers, or anything that looks out of place. Wipe away old lubricant, dirt, and debris, and any grime from each component using a clean rag. Applying fresh lube over old lubricant defeats the purpose. Step 2: Lubricate the Torsion Springs The torsion spring sits above the door and bears a significant amount of tension every time you open or close your garage door. Apply white lithium grease or a lithium-based spray lubricant along the length of each torsion spring. Be careful and precise here. If a torsion spring looks cracked or worn, stop and call a professional. Torsion spring work carries real risk, and garage door spring repair and replacement should not be a DIY experiment. Step 3: Work on the Hinges Each hinge connects the door panels and allows them to bend as the door moves along the track. Apply lubricant directly to the hinge pin and the joint of each hinge. Door hinges are one of the biggest sources of squeaking, and a properly lubricated hinge pin makes an immediate difference. If your door hinges are made of steel, use white lithium grease. For nylon or plastic hinges, silicone is the safer option. Step 4: Lubricate the Rollers Steel rollers with exposed roller bearings need lubrication on the bearing itself, not the roller body. For nylon wheels with sealed bearings, just apply a small amount to the bearing area. Avoid getting lubricant on the tracks, as this can cause the door to slip or become unbalanced. Step 5: Do Not Forget the Cables and Pulley The cable runs along the sides of the door and connects to the torsion system. Apply a light coat of spray lubricant along each cable. Spray the pulley as well, since friction there affects how smoothly the door operates. This is often an overlooked part of the overhead door system. Step 6: Wipe Off Any Excess After applying lubricant to each section, wipe off any excess with a clean cloth. Excess lubricant drips onto the floor, collects dirt and dust, and can work its way onto the tracks where you do not want it. Step 7: Test the Door Plug the door opener back in and open and close your garage door several times to work the lubricant into each joint and bearing. Listen for any remaining noise. If things still grind or feel stiff, something may need a closer look. How Often Should You Lubricate? A good rule of home maintenance is to lubricate every 6 months. If you use your garage door heavily or notice it sounding rough, bumping it every 3 months is reasonable. Keeping things well-lubricated is far cheaper than ignoring the problem until something breaks. If you’re unsure about a component or notice something off, contact 2Quick Garage Doors Woodlands for professional garage door maintenance in The Woodlands. When Lubrication Is Not Enough Sometimes, noise, resistance, or rough movement is not a lube issue. It could be a failing spring, a bent track, or a worn-out door opener. If you have done everything right and the door still does not operate correctly, it is time to call in someone who knows what they are looking at. For repairs or opener services, 2Quick Garage Doors Woodlands offers repair and installation throughout The Woodlands. Whether it is a minor fix or a full component swap, having an experienced installer handle it keeps your door safe and working the way it should. Conclusion Lubricating your garage door is one of the easiest ways to protect a system you rely on every day. Use the right products, focus on the hinges, rollers, torsion spring, cables, and pulleys, and stick to a regular schedule. Avoid WD-40 as a lube and keep it off the tracks.  A little consistency goes a long way toward quiet operation and a door that lasts. If you ever need a hand, 2Quick Garage Doors Woodlands is ready to help – just call (346) 574-0359.

Read More
May 4, 2026 admin No Comments

How to Use Your Garage Door Manual Release Safely in an Emergency

How to Use Your Garage Door Manual Release Safely in an Emergency Picture this: the power goes out, your garage door opener stops responding, and you are stuck inside or outside with no obvious way through. It is a frustrating situation, but there is a built-in solution most homeowners overlook – the manual release. Knowing how to use it correctly can save you time, stress, and even keep you safe. What Is the Manual Release on a Garage Door? Every automatic garage door opener is equipped with a manual release mechanism. This is typically a red rope that hangs from the trolley, which is the moving component that slides along the track and pulls the door up and down. Pulling the cord disconnects the door from the opener so you can operate the door by hand. Brands like Chamberlain, LiftMaster, and Genie all include this feature on their openers. The design may vary slightly, but the function is the same across most overhead doors. When Should You Use the Manual Release? The most common reason to manually open and close your garage door is during a power outage. When the power supply is cut, your automatic garage door opener remote will not work, and the door will not respond to the switch or button inside. Another reason might be a failure of the garage door opener itself, such as a broken sensor, damaged manual cable, or mechanical issue that prevents normal opening and closing. It is also useful during troubleshooting when a technician needs the door disconnected from the automatic opener temporarily. How to Open Your Garage Door Manually, Step by Step Before you start, make sure the garage door is fully closed. Attempting to disengage the opener while the door is partially open can cause the door to come crashing down, especially if you have a broken spring. If you suspect a spring issue, do not attempt manual operation; contact a technician for garage door spring repair and replacement before proceeding. Here is how to safely open your garage door manually: How to Reconnect the Trolley After Power Is Restored Once the power is restored, you will need to re-engage the opener so your automatic garage doors work normally again. This step is called reconnecting the trolley to the opener carriage. To reconnect the trolley, simply pull the release cord again, this time toward the door rather than downward. On many Genie and Chamberlain models, you can also reengage the system by pressing the button on your garage door opener remote. The opener carriage will catch the trolley as it moves, and you will hear it click back into place. Then test the door with your opener to confirm it is properly connected to the opener. If the door does not respond after reconnecting, or if the manual release does not disengage properly, it may point to a deeper mechanical issue. This is a good time to schedule garage door opener repair or routine maintenance. A Note on Automatic Garage Door Safety Garage doors are among the heaviest moving parts in a home. An automatic garage door opener is not just about convenience; it also controls the speed and tension of the door. When the opener is disconnected, that safety control is removed. Always lift the door manually with care and never leave it unattended while open. If your door feels off-balance or difficult to lift, the springs may need attention. Worn springs are a key reason manual operation becomes dangerous. Reach out for garage door spring repair and replacement before the problem gets worse. For homeowners looking to upgrade or replace older systems, exploring new garage door installation in The Woodlands is a smart long-term investment. Conclusion Using your garage door manual release does not have to be complicated. Pull the red rope, lift the door, and re-engage when power returns. The key is doing it safely and knowing when to call for help. If your opener, springs, or door itself is not performing the way it should, the team at 2Quick Garage Doors Woodlands is ready to help. Call (346) 574-0359 or visit garagedoorswoodlandstx.com to get reliable garage repair support when you need it most.

Read More
April 22, 2026 admin No Comments

How To Seal Garage Door Sides And Keep Out Drafts, Rain, And Pests

How To Seal Garage Door Sides And Keep Out Drafts, Rain, And Pests If you have ever walked into your garage and felt a cold breeze coming in from the sides of your door, you are not imagining things. Gaps along the sides of a garage door are one of the most common and overlooked problems homeowners deal with. These gaps let in drafts, rainwater, insects, rodents, and even dust that slowly builds up over time. The good news is that sealing the sides of your garage door is a manageable project. You do not need to be a contractor to get it done, but you do need to understand what you are working with and why it matters. Why Sealing Your Garage Door Sides Actually Matters Most people think of a garage as just a place to park a car or store boxes. But if your garage is attached to your home, it shares walls, air, and sometimes pests with your living space. A poorly sealed garage door can drive up your energy bills, let humidity in during Texas summers, and become an open invitation for critters looking for shelter. In The Woodlands, Texas, the weather can shift quickly. You might deal with heavy rain and flooding one week and dry, windy conditions the next. Without a proper side seal, your garage acts like a funnel for whatever the weather decides to throw your way. Beyond comfort and energy savings, there is also the issue of structural damage. Water that sneaks in through the sides of your garage door can damage flooring, walls, and anything stored inside. Over months and years, that kind of moisture exposure adds up. Understanding How Garage Door Side Seals Work Before you can fix the problem, it helps to know what you are dealing with. A garage door side seal, also called a door stop weatherstrip, is the strip of material that runs vertically along both sides of your garage door frame. Its job is to create a tight seal between the door and the door jamb when the door is closed. These seals are usually made of rubber, vinyl, or a combination of both. They flex slightly to accommodate the movement of the door while still blocking gaps. Over time, they crack, compress, or pull away from the frame. Common Signs Your Side Seals Need Replacing You might not notice the problem right away, but there are clear warning signs to watch for: If any of these sound familiar, your garage door side seals are likely the culprit or at least part of the problem. What You Need Before You Start Sealing your garage door sides is a relatively straightforward DIY project, but going in prepared makes the whole process faster and cleaner. Here is what you will need: Most weatherstrip kits designed for garage doors come with everything you need, including the hardware. Look for kits specifically labeled for garage door side seals rather than standard door or window weatherstripping, which may not be designed to handle the weight and movement of a garage door. How To Seal Garage Door Sides: Step-By-Step Step 1: Inspect the Current Seals and Frame Start with a thorough inspection. Close your garage door completely and look at the sides from both inside and outside. Check for gaps, cracks, or areas where the existing seal has pulled away from the frame. Also, look at the door jamb itself. If the wood is rotted, warped, or damaged, you may need to address that before installing a new seal. A new seal on a broken frame will not give you the result you are looking for. Step 2: Remove the Old Weatherstrip Use your flat pry bar to gently remove the old seal. Be careful not to damage the door jamb in the process. If the seal is nailed or stapled in, work slowly to pull it away cleanly. Once the old seal is removed, clean the surface. Old adhesive, dirt, or debris on the door frame will prevent the new seal from sitting flush and sealing properly. Step 3: Measure and Cut the New Seal Measure the height of your garage door from top to bottom on each side. Cut your new weatherstrip to match. It is better to cut it slightly long and trim the excess than to cut it too short. Most side seals come with a fin or lip that presses against the door to create the seal. Make sure you understand the orientation before you start attaching it. Step 4: Attach the New Seal Position the new seal along the door jamb so that the fin or flexible lip presses lightly against the closed door. It should not push so hard that it strains the door opener or causes the door to stick, but it needs to make solid contact to block drafts and rain. Use the nails or staples to secure the seal, spacing them every six to eight inches for a consistent hold. Work from the top down to keep the seal aligned as you go. Step 5: Check the Fit and Make Adjustments Once both sides are done, close the door and check for any remaining gaps. Run your hand along the edges to feel for drafts. If you notice any spots where the seal is not making contact, you may need to reposition that section or add a secondary bead of caulk along the outer edge of the frame. Do Not Forget the Other Parts of Your Garage Door Seal Sealing the sides is important, but your garage door has three other contact points that deserve attention, too. The Bottom Seal The bottom seal sits along the base of the garage door and contacts the floor when the door closes. It is the first line of defense against rain, pests, and cold air. If it is cracked or flattened, replace it along with the side seals. The Top Seal The top of the garage door also needs a seal

Read More
April 17, 2026 admin No Comments

The Ultimate Garage Door Tune-Up Checklist to Keep Your Door Running Like New

Your garage door is one of the hardest-working parts of your home. It opens and closes hundreds of times a year, faces heat, humidity, and general wear and tear, and most homeowners never give it a second thought until something goes wrong. The good news? A simple tune-up can go a long way toward keeping everything operating smoothly and helping you prevent costly repairs later. This guide gives you a practical garage door maintenance checklist you can work through at home, plus clear guidance on when it’s time to call a professional. Why Regular Maintenance Actually Matters Every garage door has moving parts – rollers, hinges, cables, springs, and a garage door opener, all working together every single time you use it. Without attention, friction builds up, components wear down, and small problems quietly turn into expensive ones. Scheduling yearly garage door maintenance, or at least a simple monthly visual check, is one of the easiest ways to extend the life of your garage door and avoid surprise breakdowns. Think of it the same way you think about changing the oil in your car. Preventive maintenance is always cheaper than emergency repairs. Your Complete Garage Door Checklist Start with a Visual Inspection Before touching anything, just watch and listen. Open and close the door a few times and pay close attention. Does it vibrate? Does it squeak or grind? Does it stay in place when you stop it halfway, or does it drift? These are all clues. Next, inspect the door panels and look for any dents, cracks, or signs of wear that could affect the door’s structure or appearance. Check the weatherstripping along the bottom and sides; worn or cracked weatherstripping lets in moisture, debris, and energy loss from your garage space. Inspect the Hardware Walk along the tracks and look for gaps, bends, or misaligned sections. Misaligned tracks can cause the door to operate unevenly or bind up completely. Use a wrench to tighten any loose bolts or brackets you notice on the track system, but do not attempt to adjust the tracks themselves if they appear bent. That’s a job for a trained technician. Check each roller for signs of wear or cracking. Worn rollers make noise and create unnecessary friction on the tracks. Most rollers can be replaced without special tools, though nylon rollers tend to last longer and run quieter. Inspect each hinge connection point along the door. A loose or cracked hinge can cause the door panels to separate or bind as the door moves. Lubricate the Moving Parts Proper lubrication is one of the most overlooked maintenance tasks homeowners skip. Use a silicone-based lubricant or a dedicated garage door lubricant, not WD-40, which is a cleaner, not a long-term lubricant. Here is what to lubricate: Clean the tracks with a dry cloth first, then lubricate as listed above. This keeps the door running smoothly and reduces the friction and noise that builds up over time. Test the Safety Sensors Your overhead door has photo eye sensors near the bottom of the tracks on each side. These safety sensors are designed to prevent the door from closing if something is in the path. To test them, place a small obstruction (like a cardboard box) in the path of the door and try to close it. The door should reverse immediately. If the door does not reverse, check if the sensors are misaligned or if there is debris blocking the eye. Clean the sensor lenses and realign them until the indicator lights are steady. If it still fails, that is a safety issue that needs prompt attention. Check the Auto-Reverse and Balance Disconnect the opener by pulling the red emergency release cord. Manually lift the door to about waist height and let go. A properly balanced door should stay in place without drifting up or down. If it moves on its own, the springs may need adjustment. The auto-reverse feature is part of the garage door and opener safety system. If the auto-reverse is not working correctly, contact a professional before using the door again. Do Not DIY the Springs or Cables Tasks involving springs or cables are not safe DIY garage door work. The torsion spring and lift cables operate under extreme tension and can cause serious injury if mishandled. Springs or cables that look frayed, broken, or corroded should be inspected and serviced by a technician only. For garage door spring repair and replacement, reach out to a qualified pro who has the right tools and training. Check Your Opener and Replace the Battery Test your garage door opener with both the wall button and the remote. Replace the battery in your remote if the response is slow or inconsistent. Also, check that the opener’s safety precautions and settings, including force limits and travel limits, are set correctly. If the opener is making unusual noise or failing to operate the door consistently, consider looking into garage door opener repair and installation options before the problem gets worse. When to Call a Pro A DIY tune-up handles a lot, but not everything. You should call a pro when you notice broken springs or cables, the door is off its tracks, the opener fails consistently, or sensors keep malfunctioning after cleaning and realignment. Trying to push through potential issues with components under extreme tension can cause the door to operate in ways that are dangerous. The team at 2Quick Garage Doors Woodlands offers routine garage door maintenance services, professional garage door repair, and new garage door installation services for homeowners who want the job done right. Conclusion A yearly maintenance routine does not take long, but it makes a real difference in how your garage door performs and how long it lasts. Use this checklist to help keep your garage door operating safely season after season.  For anything beyond the basics, or if you want a full inspection from someone who knows every garage door’s quirks inside and out, call 2Quick Garage Doors Woodlands

Read More
April 10, 2026 admin No Comments

What Is the Best R-Value for Garage Doors? How to Choose the Right Garage Door Insulation

What Is the Best R-Value for Garage Doors? How to Choose the Right Garage Door Insulation If you have ever stepped into your garage in the middle of summer or during the cooler winter months and felt that blast of hot or cold air, you have probably wondered whether your garage door insulation is doing its job. So what is the best R-value for garage doors? The answer depends on your climate, how you use your garage, and whether the space is attached to your home. In The Woodlands, Texas, where the weather can be humid and hot for much of the year, insulation plays a bigger role than many homeowners expect. Let’s break it down. What Does R-Value Mean for a Garage Door? R-value measures how well a building insulation material resists heat transfer. In simple terms, it tells you how good something is at slowing the flow of heat. The higher the R-value, the better the thermal resistance. With R-values, a higher R-value means stronger resistance to heat loss and heat gain. That helps stabilize the temperature inside the garage. This matters if: Not all garage door panels are created equal, and the insulation inside them makes a huge difference in performance. What Is the Best R-Value for Garage Doors in The Woodlands? In the Woodlands climate, you typically want an R-value insulation rating between R-12 and R-16 for an attached garage. An R16 door is a strong, efficient choice for most homes. Here is a simple way to look at it: Premium doors with polyurethane foam can offer some of the highest ratings available in residential construction. These are more expensive, but they also deliver better thermal insulation, durability, and noise reduction. The right value depends on how much comfort inside the garage is a priority for you. Types of Insulation Used in Garage Doors When choosing the right garage door, it helps to understand the types of insulation available. Polystyrene Panels Polystyrene is a rigid foam panel that is inserted into door sections. It is similar to styrofoam. It provides solid R-value insulation at a reasonable budget. This type is common in mid-range doors. The thickness of the panel and how well it seals inside the garage affect overall performance. Polyurethane Foam Polyurethane is injected between steel layers and expands to fill the space. This creates a dense, thick insulation layer with excellent thermal resistance. Polyurethane doors often have a higher R-value and better structural strength. If you are buying a new garage door and want top performance, this is often the best option. Reflective and Fiberglass Options Reflective insulation works by bouncing radiant heat away from the interior. Fiberglass can also be used in some door panels. These options can help in hot, humid conditions, but they may not provide the same high R-values as polyurethane. Always compare the actual R-values rather than assuming one type is better. Why Insulating Your Garage Door Matters Many homeowners focus on walls and ceiling insulation, but forget the largest moving wall of the garage, the door itself. Without proper insulation: An insulated garage door helps reduce heat loss, supports efficient energy use, and creates a more comfortable space for your car, tools, and storage. And remember, insulation is only part of the equation. A proper seal around the perimeter and between door sections is critical. Even the best R-value will not help much if air leaks around the edges. Should You Add Garage Door Insulation or Buy a New Door? If you already have a basic steel door, you might consider a cheap insulation kit that you attach to the inside. These often use rigid foam or reflective material. This can help, but results vary. DIY kits do not always seal perfectly, and they may not match the thermal resistance ratings of a professionally installed system. If your current door is older, damaged, or inefficient, investing in professional garage door installation services may be the smarter long-term option. A new garage door with built-in R-value insulation is designed as a complete system, not just an add-on. If your door is structurally sound but underperforming, routine garage door maintenance services can also help ensure panels, seals, and hardware stay in good shape. Other Factors That Affect Garage Temperature Insulation is important, but it is not the only factor. If you have two doors instead of one large door, that can also impact heat flow and air leakage. And do not forget your garage door opener repair and installation. An efficient opener keeps door sections aligned and sealing correctly, which supports insulation performance. If your existing system struggles or the door does not close fully, it may be time for reliable garage door repair in The Woodlands before upgrading insulation. How to Measure What You Really Need To determine the best R-value for your situation, ask yourself: In The Woodlands, where humid conditions and high heat are common, insulating your garage door is often a smart investment rather than an unnecessary upgrade. Conclusion The best R-value for garage doors in The Woodlands is typically between R-12 and R-16, with higher R-value options offering better comfort and energy efficiency. The right choice depends on how you use your garage and how important temperature control is to your home.  If you are unsure what makes sense for your property, the team at 2Quick Garage Doors Woodlands can help you compare options and find a solution that fits your needs and budget. Call (346) 574-0359 to explore practical, professional guidance you can trust.

Read More